Publishing information is a critical mission in many
organizations — large or small. Companies of all sizes can effectively
leverage the output of information to communicate a positive message to
their investors, customers, vendors, and employees.
This is normally the job of the communications group
in an enterprise organization. In smaller companies, this job is
typically done by IT, even if the business is creating the content.
Reasons for this may be ownership of the web server machine to
understanding how to put together an HTML page.
SharePoint 2010 content deployment gets everyone in
the organization involved, except for IT (outside of configuration),
which is a liberating experience for users. It ensures that IT is no
longer a bottleneck.
Content deployment moves data from a source site to a
destination site without any interference. It is critical to define and
configure where the data goes.
In this recipe, we will configure and set up a content deployment job.
Getting ready
You must have farm-level administrative permissions to the Central Administration site.
Configure two web applications prior to beginning this recipe. They are:
Create the following Team Site structure:
How to do it...
Open the Central Administration screen and click General Application Settings.
Click Configure Content Deployment.
A new page is displayed with six sections:
Accept Content Deployment Jobs: choose Accept incoming...
Import Server: Select Destination Server.
Export Server: Select Source Server.
Connection Security: Retain the default encryption.
Temporary Files: Retain the default setting.
Reporting: Retain the default setting.
Click OK.
Click Application Management.
Under the second section named Site Collections, click Create site collections.
Click WebAppD for Web Application.
Fill in the other fields appropriately, except Template Selection. For this option choose the Custom tab and leave < Select template later... > as selected.
Click OK.
Click General Application Settings. Under the Content Deployment section, click Configure content deployment.
Fill in the following on the ensuing page:
Name of Content Deploy job: CD to Dest.
Source web application.
Destination Central Administration Server with Port number. You must type this in the format: http://servername:port#.
Enter in the Authentication Info.
Click the Connect button.
After the connection is successful, you can enter the Destination — WebAppD and / as the Destination site collection. Leave the other options as default.
Click OK.
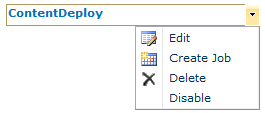
Create the job by clicking Create Job in the drop-down list as show in the following screenshot:
On the ensuing page, modify the following:
Click OK.
Click OK.
Hover over the newly created job CD to Dest and choose Run Now from the drop-down list.
How it works...
The first thing to understand about content
deployment is that the source and destination cannot be in the same
database. The simplest way around this is to create two web
applications, as was done as per the requirements of this recipe.
Content deployment extracts the data from the source
content database as an XML file. Another process imports the XML file
and extracts it onto the destination content database.
The reason behind choosing the <Select template later...>
option when setting up a destination site collection is that the first
time content deploy is run, all assets are transported to the
destination site. This includes even the site template. Of course that
template must be available in the destination site or the job will fail.
Ensuing jobs only deploy changes since the last
successful run. Next a path is set up, which is simply a mapping between
the source and the destination site collections. Once the mapping
(path) is in place, a job can be set up. This was done in steps 12 and
13.
Finally a job was manually run in step 14. The
outcome of this job should be a new Team Site collection with only SiteA
and SiteC available.
There's more...
When assigning the path, you may get the following error:
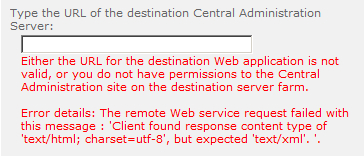
A possible reason for this error is that both the
source and destination site collections reside in the same content
database under the same web application. The content deployment process
cannot create a new item in the destination using the same GUIDs as the
source.
The solution is to deploy to another web application.